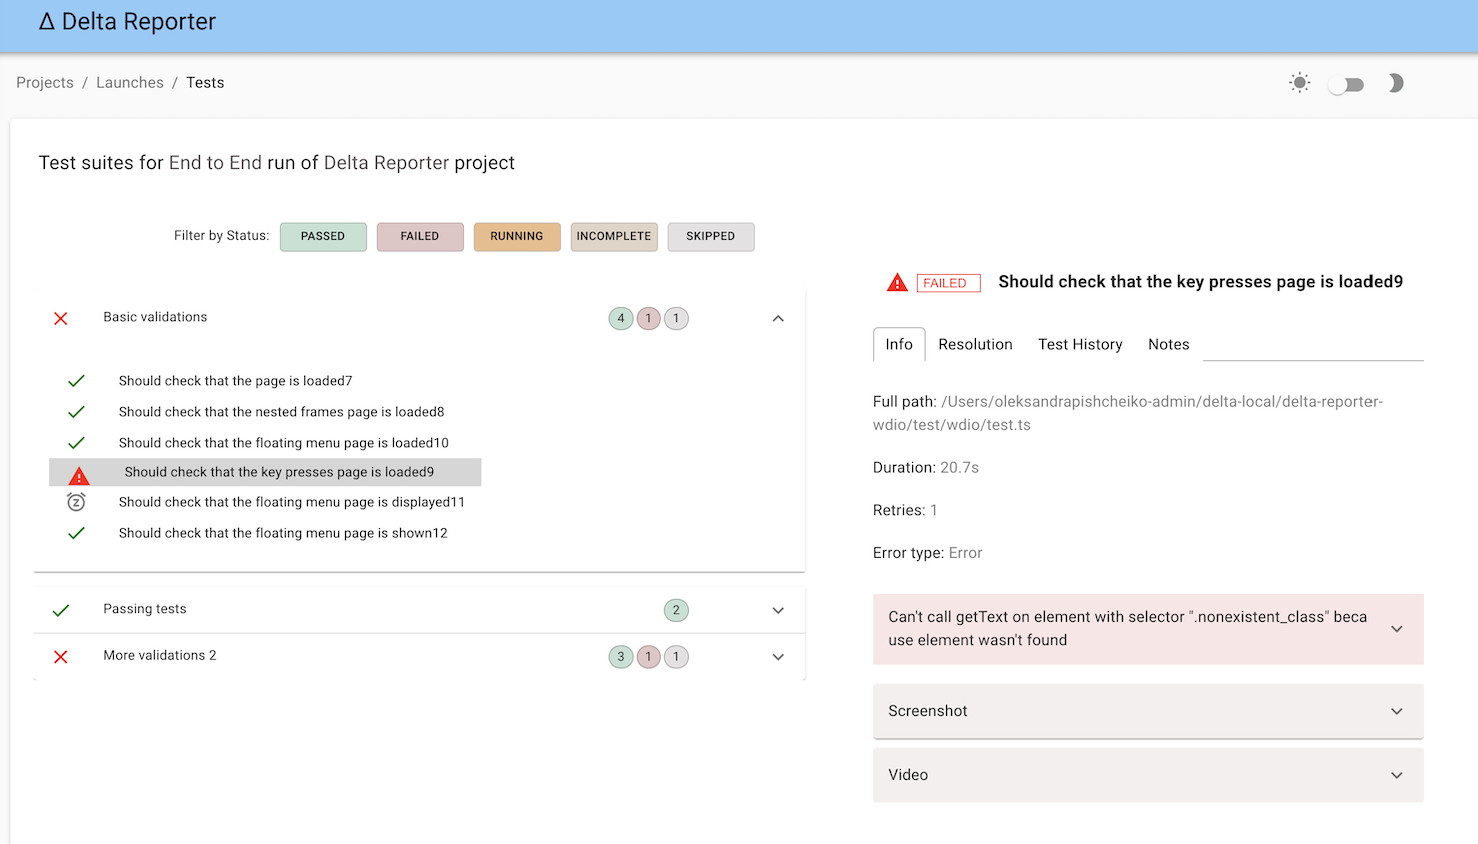
Delta Reporter Reporter
wdio-delta-reporter-service is a 3rd party package, for more information please see GitHub | npm
A WebdriverIO reporter plugin to create Delta reports

Installation
The easiest way is to keep @delta-reporter/wdio-delta-reporter-service as a devDependency in your package.json.
{
  "devDependencies": {
    "@delta-reporter/wdio-delta-reporter-service": "^1.1.9",
  }
}
You can simple do it by:
npm i @delta-reporter/wdio-delta-reporter-service
Configuration
Delta reporter WebdriverIO plugin consists of a mix between a WebdriverIO Service and Reporter, so it needs to be declared as a reporter and as a service in config file.
const DeltaReporter = require('@delta-reporter/wdio-delta-reporter-service/lib/src/reporter');
const DeltaService = require("@delta-reporter/wdio-delta-reporter-service");

let delta_config = {
  enabled: true,
  host: 'delta_host',
  project: 'Project Name',
  testType: 'Test Type'
};

exports.config = {
  // ...
  reporters: [
    [DeltaReporter, delta_config]
  ],
  // ...
  services: [new DeltaService(delta_config)],
  // ...
}
Add screenshots and videos
Screenshots can be attached to the report by using the sendFileToTest command in afterTest hook in wdio config file. The parameters are type, file and description:
type: Can beimgorvideofile: Path to the file to be uploadeddescription: Optional value that will be displayed in the media container in Delta Reporter
As shown in the example above, when this function is called, adn the test is failing, a screenshot image will be attached to the Delta report.
 afterTest(test) {
    if (test.passed === false) {
      const file_name = 'screenshot.png';
      const outputFile = path.join(__dirname, file_name);

      browser.saveScreenshot(outputFile);
      browser.sendFileToTest('img', outputFile);
    }
  }
Below is an example of all pieces needed in wdio config file to use this plugin along with Video Reporter, so that Delta Reporter is showing screenshots and videos of failed tests:
var path = require('path');
const fs = require('fs');
const video = require('wdio-video-reporter');
const DeltaReporter = require('@delta-reporter/wdio-delta-reporter-service/lib/src/reporter');
const DeltaService = require("@delta-reporter/wdio-delta-reporter-service");

// ...

function getLatestFile({ directory, extension }, callback) {
  fs.readdir(directory, (_, dirlist) => {
    const latest = dirlist
      .map(_path => ({ stat: fs.lstatSync(path.join(directory, _path)), dir: _path }))
      .filter(_path => _path.stat.isFile())
      .filter(_path => (extension ? _path.dir.endsWith(`.${extension}`) : 1))
      .sort((a, b) => b.stat.mtime - a.stat.mtime)
      .map(_path => _path.dir);
    callback(directory + '/' + latest[0]);
  });
}

let delta_config = {
  enabled: true,
  host: 'delta_host', // put your Delta Core url here
  project: 'Project Name', // Name of your project
  testType: 'Test Type' // eg., End to End, E2E, Frontend Acceptance Tests
};

// ...

exports.config = {
  // ...
  reporters: [
    [DeltaReporter, delta_config]
  ],
  // ...
  services: [new DeltaService(delta_config)],


  // ...


  afterTest(test) {
    if (test.passed === false) {
      const file_name = 'screenshot.png';
      const outputFile = path.join(__dirname, file_name);

      browser.saveScreenshot(outputFile);
      browser.sendFileToTest('img', outputFile);

      getLatestFile({ directory: browser.options.outputDir + '/_results_', extension: 'mp4' }, (filename = null) => {
        browser.sendFileToTest('video', filename, 'Video captured during test execution');
      });
    }
  }

  // ...

}
Usage
For each test run, Delta plugin is listening for DELTA_LAUNCH_ID. There are two main cases:
Local run: No need to do anything, you can just run your wdio command (
./node_modules/.bin/wdio ./wdio.conf.js) and DELTA_LAUNCH_ID will be generated automatically for you, so your test results appear in Delta Reporter in real time.CI run: If it's your tests job, you will have to define DELTA_LAUNCH_ID as a parameter. Then inside your stage you will need to initialize it by calling a
/api/v1/launchendpoint, then running your tests withDELTA_LAUNCH_ID=${DELTA_LAUNCH_ID}pre-pending. The initialization is done once, so when you are running multiple test types in the same build (say, UI tests, API tests, Unit tests), those tests are gathered under one "Launch" on Delta Reporter.
Below is an example of code for config file for Jenkins job:
// ...
  parameters {
      string defaultValue: '', description: 'Launch ID sent by a pipeline, leave it blank', name: 'DELTA_LAUNCH_ID', trim: false
  }

// ...

  stage('Run WDIO tests') {
    environment {
      DELTA_LAUNCH_ID = ""
    }
    steps {
      container('jenkins-node-worker') {
        script {
          try {
            DELTA_LAUNCH_ID=sh(script: "curl -s --header \"Content-Type: application/json\" --request POST --data '{\"name\": \"${JOB_NAME} | ${BUILD_NUMBER} | Wdio Tests\", \"project\": \"Your project\"}' https://delta-core-url/api/v1/launch | python -c 'import sys, json; print(json.load(sys.stdin)[\"id\"])';", returnStdout: true)
          } catch (Exception e) {
              echo 'Couldn\'t start launch on Delta Reporter: ' + e
          }

          sh "DELTA_LAUNCH_ID=${DELTA_LAUNCH_ID} TEST_TYPE='Frontend Acceptance Tests' ./node_modules/.bin/wdio ./wdio.conf.js"
        }
      }
    }
  }
Sending extra data to Delta Reporter
Its possible to send custom data to be displayed into Delta Reporter using the SmartLinks feature.
For this use the commands browser.sendDataToTest or sendDataToTestRun, depending on the place where you want to show this information
These methods accept a jsonify object as argument
Example of integration with Spectre
  beforeSuite() {
    try {
      let spectreTestRunURL = fs.readFileSync('./.spectre_test_run_url.json');
      let test_run_payload = {
        spectre_test_run_url: spectreTestRunURL.toString()
      };
      browser.sendDataToTestRun(test_run_payload);
    } catch {
      log.info('No Spectre URL found');
    }
  }
Then on Delta Reporter, a SmartLink with {spectre_test_run_url} can be created for the test run
For more information about Smart Links, please check Delta Reporter docs